How to log in?
BI Tools to connect to your Amazon Redshift Cluster
Revel Data Connector solution is universal and it should work with all the BI tools. Below you can find instructions on connecting to our customers' most common BI tools: Power BI & Google Data Studio.
Power BI
Note: The instructions provided below are for the desktop version of Power BI
Step 1: Get data
To connect to an “Amazon Redshift” database, select “Get data” from the “Home” ribbon in Power BI Desktop. Select “Database” from the categories on the left, and you see “Amazon Redshift”.
Screenshot of the Get Data dialog, showing the Amazon Redshift database selection.

Step 2: Server and Database Info
In the “Amazon Redshift” window that appears, type or paste the name of your “Amazon Redshift” server and database into the box. As part of the Server field, users can specify a port in the following format: ServerURL:Port

Step 3: Credentials
When prompted, put in your username and password. You should use the server name that precisely matches the SSL certificate to avoid errors.

Step 4: Connection settings
After clicking Connect you might encounter the following error. If you don't see this error and you're redirected to the Navigator view, skip this step and jump to Step 5.

This is expected, as PowerBI's default configuration includes the custom DNS hostname verification as a part of the encrypted connection checks.
In order to mitigate the error, go to File -> Options and settings -> Data source settings

In the list of data sources, select the data source which was recently configured (e.g. dwh.revelup.io) and click Edit Permissions....

IMPORTANT
We are still enforcing the appropriate security level by forcing an encrypted connection and verifying the SSL certificate from the server-side. We also use a custom domain to provide users a better experience and prevent unnecessary connection string modifications after performing server maintenance.
Uncheck Encrypt Connections and click Save

Repeat the data configuration step by clicking the “Get data” button from the “Home” ribbon. After entering the server details as specified in Step 1 (the tool should not require you to re-enter the credentials this time) and clicking Connect you should be able to see the Navigator window.
Step 5: Navigator
Once you successfully connect, a “Navigator” window appears and displays the data available on the server, from which you can select one or multiple elements to import and use in “Power BI Desktop”.

Step 6: Loading or Transforming the data
Once you make selections from the “Navigator” window, you can either “Load” or “Transform” the data.
-
If you choose to “Load” data, you'll be prompted to use either Import or DirectQuery mode to load the data. For more information, check out this article that explains DirectQuery.
-
If you select to “Transform” data, “Power Query Editor” appears where you can apply all sorts of transformations and filters to the data, many of which are applied to the underlying “Amazon Redshift” database itself (if supported).
Google Looker Studio (Formerly Google Data Studio)
Step 1: Get data
To connect to an “Amazon Redshift Connector”, click on "Blank Report" in the landing page. Search for “Amazon Redshift” and you will see it in the Google Connectors section. Select it.

Step 2: Database Authentication
In the “Amazon Redshift” window that appears, type or paste the name of your “Amazon Redshift” host name, port, database, username and password.
Check the Enable SSL checkbox.
Download Amazon Redshift SSL Certificate from here: https://s3.amazonaws.com/redshift-downloads/amazon-trust-ca-bundle.crt
Upload the downloaded Amazon Redshift SSL Certificate to Looker Studio.
Click “Authenticate”.

Step 3: Loading the data
Select Table or enter Customer Query and Click “Add”
A modal pops up to confirm. Click on “Add to Report”
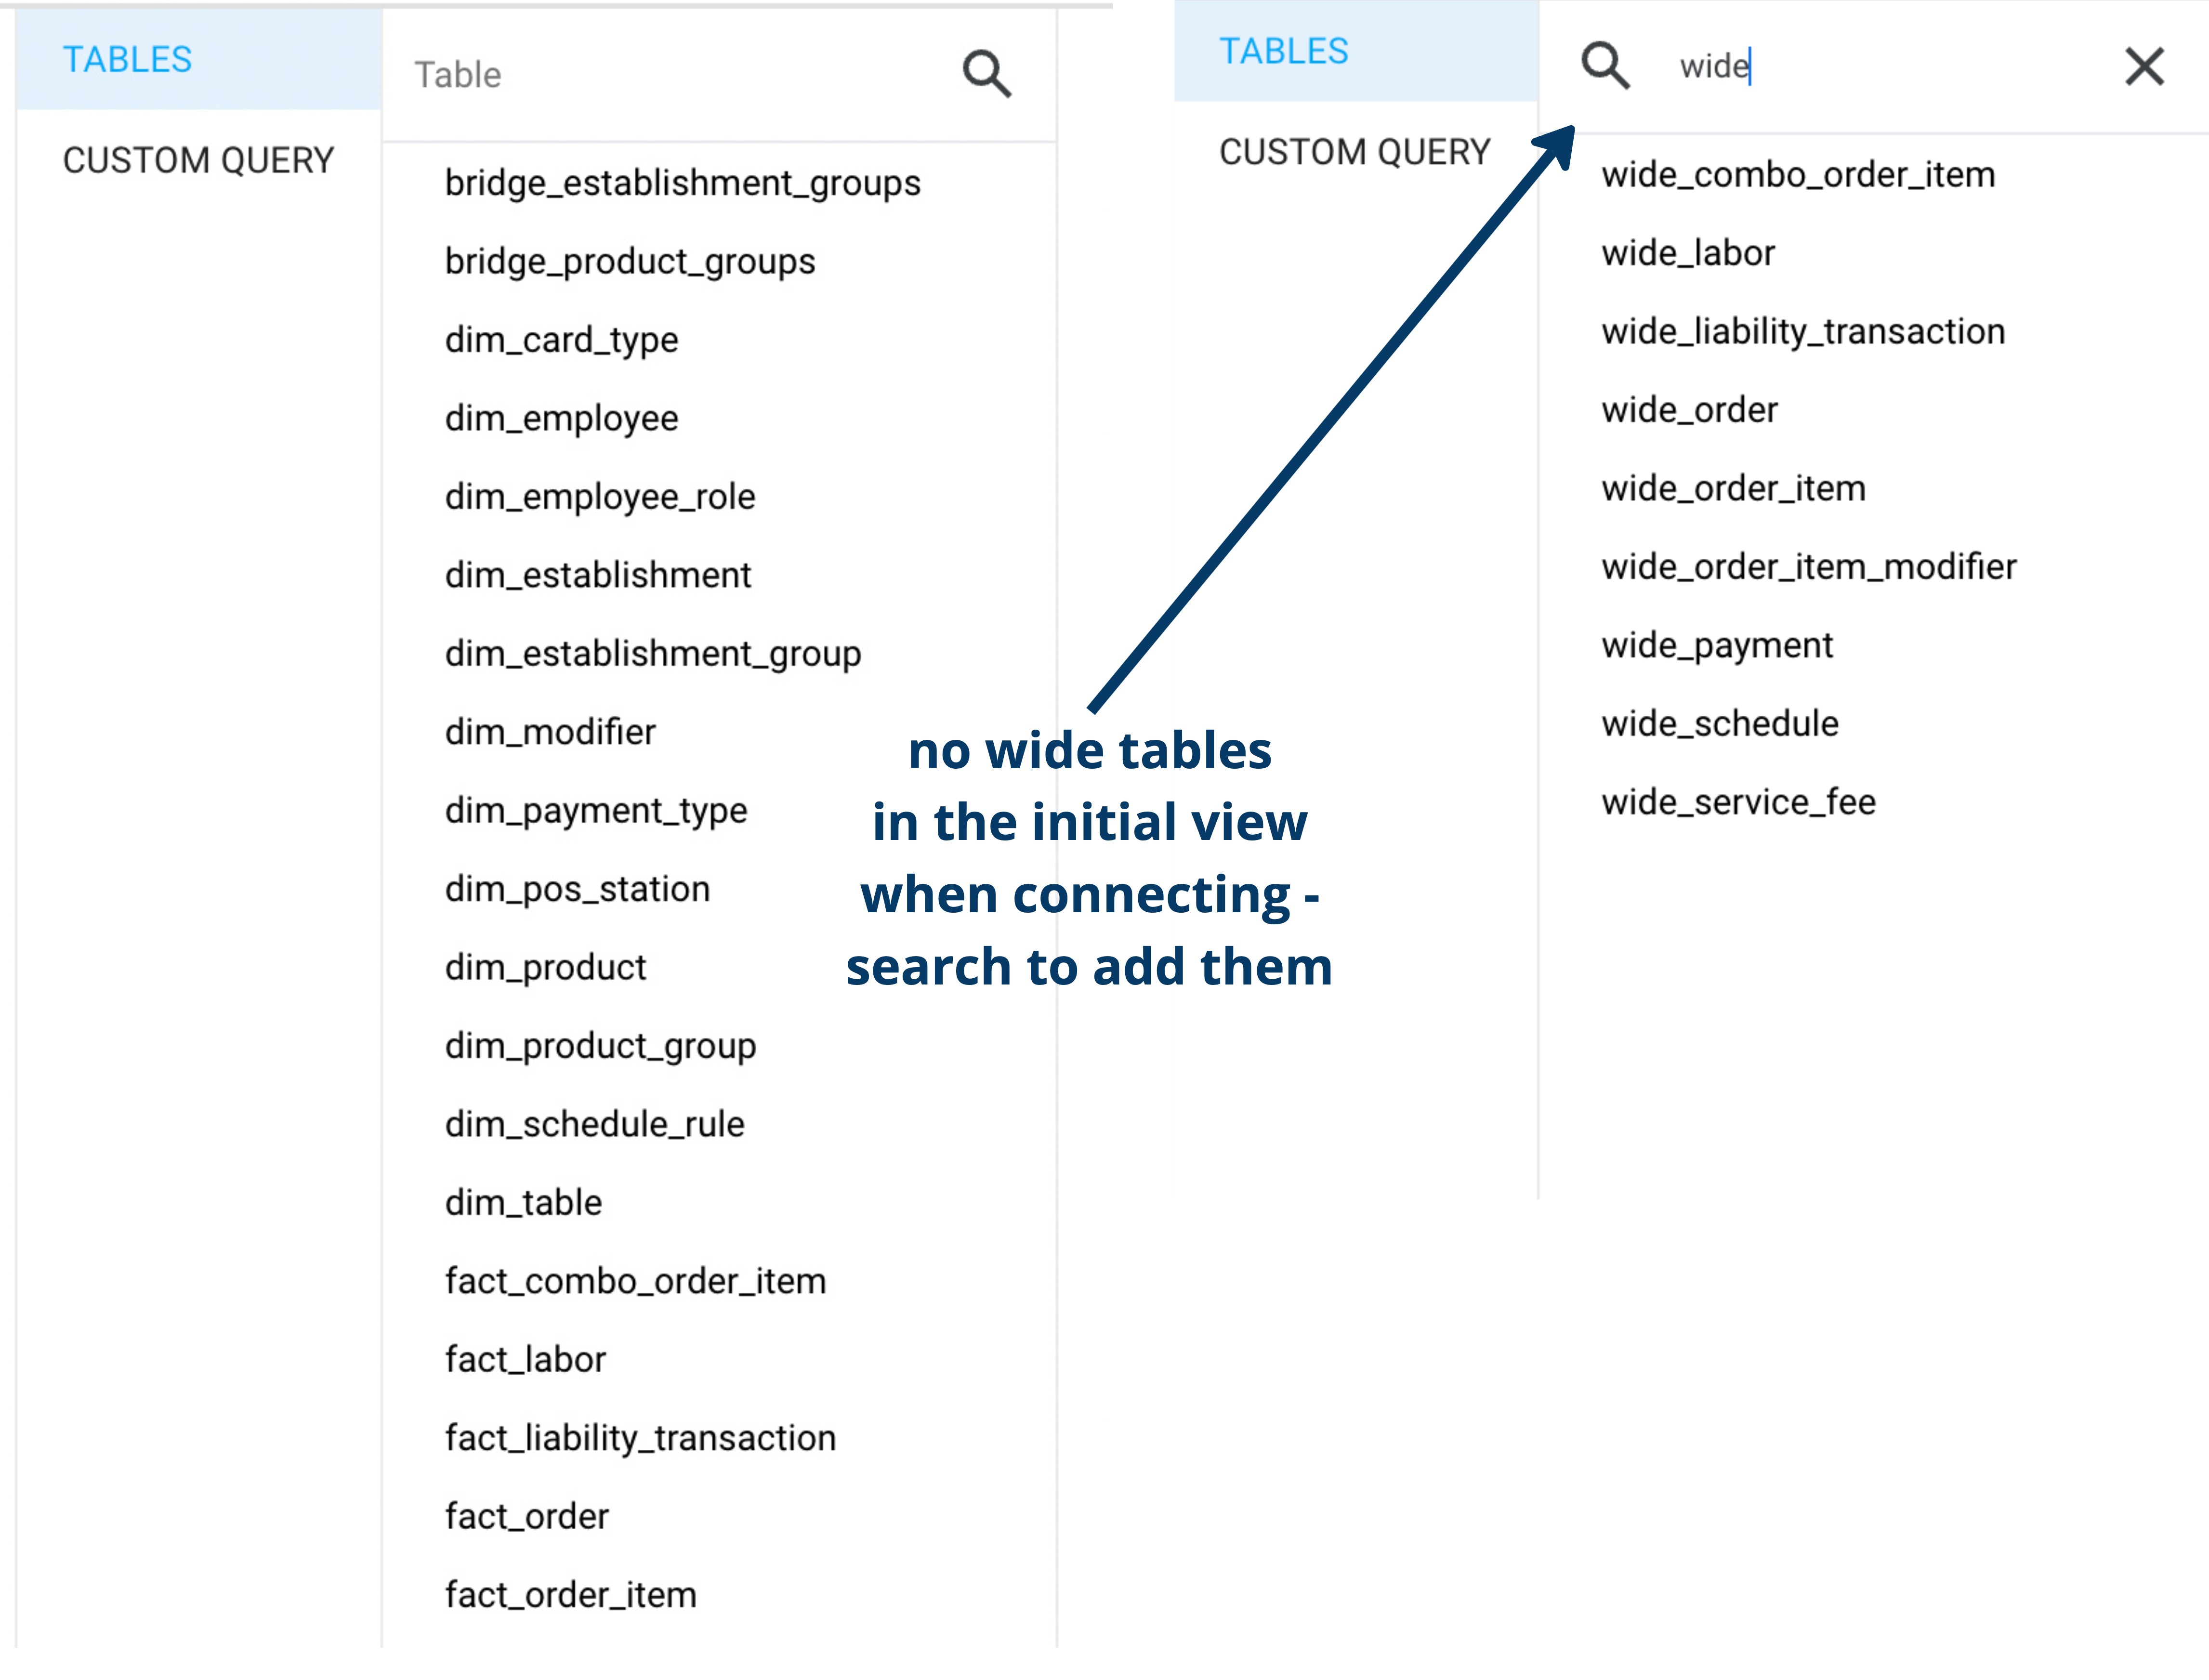
Note that Looker Studio interface does not show the full list of available tables when connecting a data source. To get the best experience of Revel Data Connector, we recommend using wide tables, which are not visible initially. To find and connect them, search for "wide":
Updated 5 months ago